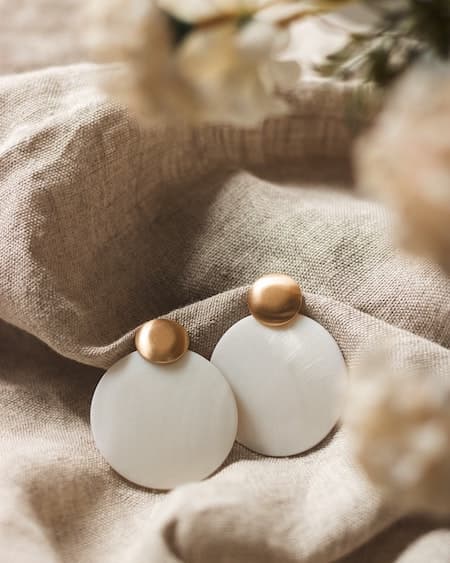
How To Make DIY Acrylic Earrings
Acrylic earrings have become a popular fashion accessory. Their bright colors and unique shapes catch the eye of many fashionistas.
These lightweight, affordable earrings are a fun way to add a pop of color to any outfit.
And DIY acrylic earrings allow you to customize your jewelry to match your style and taste while providing a sense of accomplishment from creating something with your own hands.
How to make your own acrylic earrings
Making your own acrylic earrings isn’t difficult. You just need the right supplies and a bit of creativity.
How to make simple acrylic earrings
If you want to make a quick statement piece, using clear, precut acrylic shapes to make your earrings is probably the simplest option.

Shop DIY Acrylic Earrings Craft Kit
You can find all of the materials you need at any craft store. Or you can grab a DIY craft kit that contains most of the items you need.
Materials needed:
- Acrylic shapes
- Earring hooks and jump rings
- Jewelry pliers
- X-Acto knife
- Colored vinyl
- Gloss Mod Podge
- Sandpaper
- Pencil
Steps:
- Put your colored vinyl sheet on the table upside down.
- Place your acrylic pieces on top of the sheet and trace the shape with a pencil.
- Use your X-Acto knife to cut out the vinyl shape. Be sure to cut the shape as close to the line as possible. You want your lines to be straight, but the shape to be slightly smaller than your acrylic shape.
- Place the colored part of the vinyl shape on the back of your acrylic shape.
- Brush a layer of Mod Podge over it. Be sure to get a light coat around the edge of the earrings to keep it secure. Let it dry for 10 minutes.
- Lightly sand the edges of the earring so they are smooth.
- Repeat steps 5 and 6 two more times.
- Once your earrings are completely dry, slide the jump rings into the precut hole and use your pliers to close them.
- Then, use your jewelry pliers to attach the earring hooks to the jump rings.
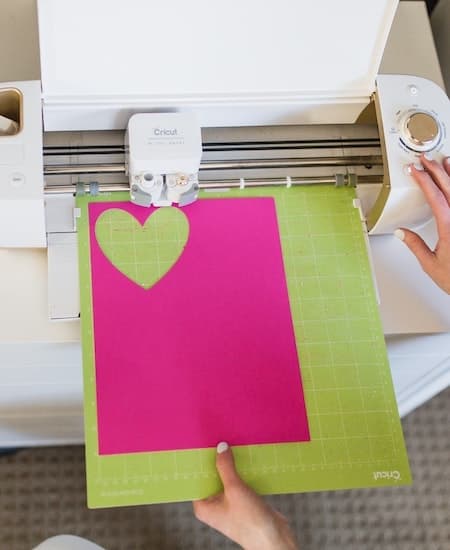
How to make acrylic earrings with a Cricut
If you want to be a bit more creative. You can use a Cricut machine and acrylic sheets to make DIY earrings in various styles and shapes.
What type of Cricut do you need?
Not all Cricut machines are able to cut acrylic.
If you want to make pairs of earrings using different materials, it’s a good idea to look for a Cricut Explore 3. It can cut over 300 types of material, including .007 and .020 acrylic.
Materials needed:
- Acrylic sheets
- Cricut machine
- Cricut Design Space software
- StandardGrip cutting mat
- Weeding tool
- An earring kit with hooks and jump rings
- Pliers
- Hole puncher
- Sandpaper
Steps:
- The first step is to create your design in Cricut Design Space. You can choose from existing designs or create your own from scratch.
- Cut your acrylic sheet to the size of your cutting mat.
- Place your acrylic sheet on the StandardGrip cutting mat and load it into your Cricut machine.
- Adjust the settings in Cricut Design Space according to the type of acrylic sheet you are using.
- Cut out your design with the Cricut machine.
- Use the weeding tool to remove the excess acrylic around your design.
- Sand the edges of the acrylic piece with sandpaper to smooth out any roughness or sharpness.
- Use a hole puncher to make a hole at the top of the acrylic piece where you want to attach the earring hook.
- Attach a jump ring to the hole using the pliers.
- Attach the earring hook to the jump ring.
- Repeat the process to make a matching earring.

Get creative with your designs
Whether you use acrylic blanks or you use a Cricut maker to create completely unique designs, making your own jewelry is fun and exciting.
And the best part is, you can make gorgeous acrylic earrings using different materials to add color and designs.
Shrink film designs
When you use clear acrylic in different shapes to make your earrings, you can add a splash of color or shapes with shrink film, a pack of Sharpies with lots of colors, and some Mod Podge.
Use the Sharpie’s to hand-draw designs on the shrink film. Then, heat the film according to instructions on the package. Once it’s finished and cooled, apply it to your earrings using thin coats of Mod Podge.
Use alcohol ink to color your earrings
You can create some cool color combinations using alcohol ink to design your earrings. It especially works well when you’re using an acrylic disc shape specifically designed for use with alcohol ink.
To create colorful designs drop a little bit of alcohol ink onto the earring. Then, swirl the alcohol ink around with a paper towel or a cotton swab.
To make bolder designs:
- Cut small vinyl designs out using your Cricut.
- Put the vinyl on the acrylic earrings.
- Put paper towels down and place the earrings on them.
- Put alcohol ink directly on the earrings, over top of the vinyl.
- Wait for the alcohol ink to dry.
- Gently pull the vinyl away from the earrings to reveal the clear design behind it.
Ultimately, there are lots of ways to make your own acrylic earrings. And the fact is, it’s easy to make a statement when you’re wearing your own designs.
Other posts you might like: