How To Make A DIY Nail Dehydrator You Can Use At Home
Proper nail preparation is crucial for long lasting, professional results with nail enhancements. And a nail dehydrator that removes moisture and excess oil is essential for better adhesion.
In this article, we’ll show you how to DIY a nail dehydrator, guiding you through creating a cost-effective solution that gives you salon-quality results.
What is nail dehydrator?
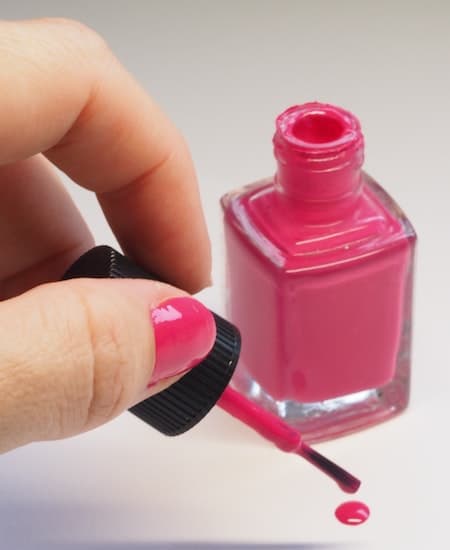
A nail dehydrator is a solution used on your natural nails to remove moisture from the nails before applying nail enhancements, such as gel polish, acrylic nails, nail wraps, or polish.
It is often used in combination with an acid-free primer to create the optimal surface for better adhesion of artificial nails.
The main reason to use a nail dehydrator is to dehydrate the nails, creating a dry surface for better adhesion of nail products. When nails are hydrated, they can become more flexible, making it difficult for nail enhancements to adhere properly.
Using a nail dehydrator removes excess moisture from the nail bed, allowing the nail enhancement to adhere properly and preventing lifting and chipping.
It can be used anytime you want a long-lasting manicure or are using acrylic powder or gel products on your nails.

Benefits of using a nail dehydrator
One of the main advantages of using a nail dehydrator is the prolonged wear of nail enhancements. The dehydrator ensures better bonding by removing oils and moisture, reducing the chances of your acrylic or gel nails falling off prematurely.
Better adhesion also helps prevent lifting and chipping, making it ideal for wearing underneath your base coat or nail polish. And using a DIY nail dehydrator is more cost effective than purchasing it outright.
Step-by-step guide to making a DIY nail dehydrator
Making nail dehydrator at home isn’t difficult. Simply follow the steps below.
Get The Necessary Materials and tools
You will need a few essential ingredients and tools to make a DIY nail dehydrator, including:
Isopropyl alcohol, also known as rubbing alcohol, is a common disinfectant that can be easily found at most drugstores or supermarkets. Acetone is a potent solvent that helps to remove any remaining moisture or oils from the surface of the nail plate.
You’ll also need some tools and equipment:
- Clean, empty nail polish bottle or small spray bottle
- Funnel or pipette for transferring liquids
- Measuring cup or spoon
- Clean cotton pads, lint-free wipes, or a clean nail polish brush
Tips for selecting the right materials
When choosing the materials to make your own nail dehydrator, please be sure to choose high-quality ingredients and tools. Using low-quality ingredients or tools can impact the effectiveness of your dehydrator and may even damage your nails.
Always choose a clean and dry workspace to ensure optimal results.
Prepare your workspace
Before you begin mixing the ingredients, prepare your workspace. Choose a clean, dry area, and make sure all your tools and materials are within reach.
Mix the nail dehydrator solution
- In a clean measuring cup, mix two parts of isopropyl alcohol with one part of acetone. For example, if you’re using one cup of isopropyl alcohol, use half of a cup of acetone.
- Transfer the solution to a clean, empty nail polish bottle or small spray bottle. If you can’t pour the solution from the measuring cup without spilling it, consider using a small funnel.
- Seal the bottle tightly, and shake well to mix the ingredients.
Store your nail dehydrator properly
Store your DIY nail dehydrator solution in a cool, dry place away from heat sources or open flames. Avoid exposure to direct sunlight or high temperatures, as this can affect the effectiveness of the solution.
Keep it away from heat sources or open flames and out of reach of children and pets.
How to use your DIY nail dehydrator
A DIY nail dehydrator is essential in achieving a long-lasting and professional-looking manicure or nail enhancement.
Here’s how to use your homemade nail dehydrator.
Proper nail preparation
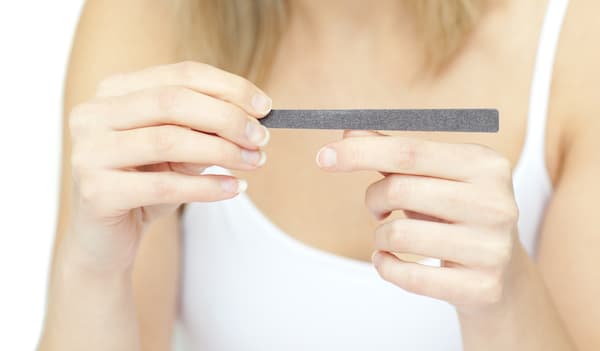
Before applying the DIY nail dehydrator, ensure your nails are clean, dry, and free of any existing acetone, gel, or nail polishes. Use a nail file to shape your nails, and gently push back your cuticles with a cuticle pusher.
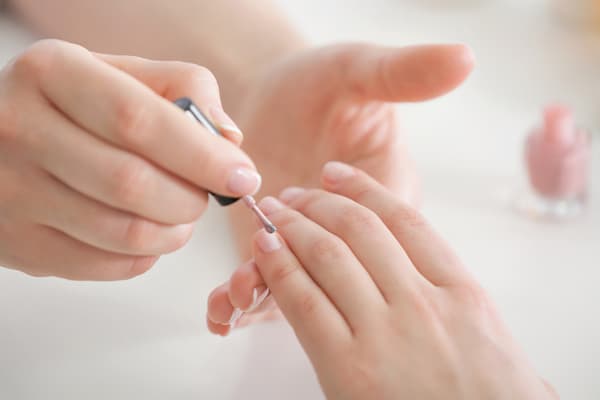
Applying the DIY nail dehydrator
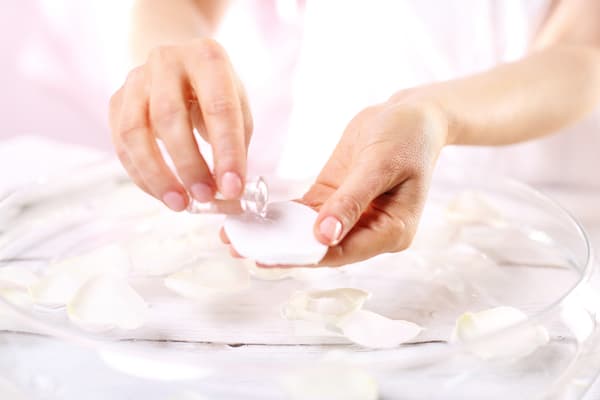
To apply the nail dehydrator, saturate a clean cotton pad or lint-free wipe with the solution and swipe it across the entire natural nail plate. Ensure that you cover the entire surface of each nail, including the tips and edges. Avoid contact with the skin or cuticles.
Drying and additional steps
Allow the nail dehydrator to dry completely before applying any regular polish, acetone, gel nail polish, or builder gel. This usually takes around 10 to 15 seconds.
After the nail dehydrator has dried, you can proceed with your chosen nail enhancement, such as applying nail polish or acrylics.
Tips for successful nail dehydrator application
When using a DIY nail dehydrator, it’s essential to apply it evenly and allow it to dry completely before proceeding with any nail enhancement. Follow the proper nail preparation steps, including shaping and cleaning your nails.
Also, refrain from substituting cotton pads with cotton balls. You want to avoid using a cotton ball to apply your own DIY nail dehydrator because it could leave residue behind.

Safety considerations
When using a nail dehydrator, ensure that you are in a well-ventilated area and avoid inhaling the fumes. Use protective gloves and eyewear if necessary, and avoid contact with the skin or eyes.
If the solution comes into contact with the skin, rinse immediately with water.
How alcohol works as a nail primer
Alcohol, particularly isopropyl alcohol, is an effective and affordable solution for preparing nails before applying enhancements.
It removes natural oils and moisture from the natural nail surface, dehydrates the nails, and promotes strong adhesion of nail products, preventing common nail issues like lifting and peeling.

Other things you need for professional artificial nail application at home
If you want to do a complete set of nails at home instead of going to the nail salon, there are a few more things you need, including:
- Cuticle oil
- Strong nail files
- Gel or acrylic nail kit
- Nail polish remover
- Nail polishes
- Bottles of base coat and top coat
- Nail drill
- UV lamp
FAQs

What can I use instead of a dehydrator for nails?
While a nail dehydrator is the most effective option for nail prep, using rubbing alcohol, vinegar, or an acid-based primer can help achieve similar results if a dehydrator is not available.
Can hand sanitizer be used as a nail dehydrator?
Hand sanitizer is not recommended as a substitute for a nail dehydrator as it may leave a residue on the nails and cause skin irritation.
It’s best to use a nail dehydrator or other nail-specific products such as rubbing alcohol or vinegar for proper nail preparation to avoid common nail issues and achieve longer-lasting and professional-looking nail enhancements.


What are the ingredients in nail dehydrators?
The primary ingredients in nail dehydrators are solvents such as isopropyl alcohol and acetone. Some nail dehydrators may also contain additional ingredients, such as antifungal agents or moisturizers, to provide additional benefits.
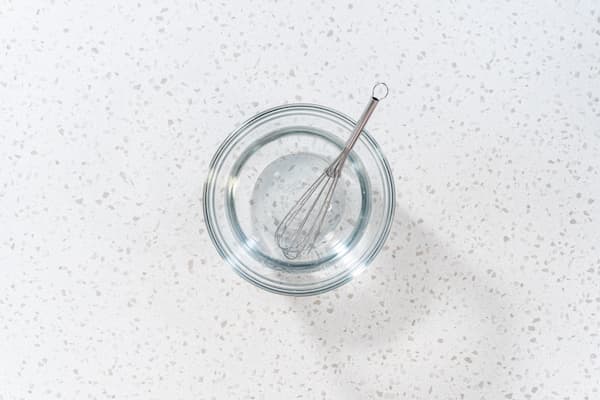
Can I use vinegar as a nail dehydrator?
Yes, you can use vinegar as an alternative to a nail dehydrator. Vinegar is an effective natural disinfectant that can help to remove oil residues and residue from the surface of your nails.
Mix equal parts of white vinegar and water in a bowl to use vinegar as a nail dehydrator. Soak your nails in the solution for 5 to 10 minutes, then dry them thoroughly with a clean towel.
Keep in mind, vinegar may not be as effective as a commercial nail dehydrator or rubbing alcohol, so it’s essential to patch-test any new products before use and monitor your nails for any adverse reactions.
Can I use hydrogen peroxide instead of rubbing alcohol for gel nails?
Hydrogen peroxide is not recommended as a substitute for rubbing alcohol for gel nails because it’s a bleaching agent that can be harsh on the skin and nails, causing dryness and irritation.
If rubbing alcohol isn’t available, you can use other alternatives such as a white vinegar and water mixture or a nail dehydrator to achieve similar results.
Conclusion
While nail dehydrators and primers are often available commercially, DIY options using readily available materials can also be effective and affordable.
Incorporating a nail dehydrator into your at-home nail care routine can help provide a flawless result by elevating the quality of your manicures and ensuring they last longer.
Other posts you might like: